Withered Savanna
Withered Savanna (Japanese: カレカレ草原 Withered Savanna) is a playable dungeon the player goes through in Pokémon Mystery Dungeon: Gates to Infinity. It has 17 floors and no boss. The fifth floor contains a detour that requires an Electric-type Pokémon to pass through. This dungeon is accessible after completing the Ochre Quarry dungeon. The weather can be sunny or a sandstorm in this dungeon.
|
|
|
| ||||||||||||||||||||||||||||||||||||||||||
| ||||||||||||||||||||||||||||||||||||||||||
| ||||||||||||||||||||||||||||||||||||||||||

Pokémon encountered
Withered Savanna
| Pokémon | Floors | Levels | Recruit Rate | |
|---|---|---|---|---|
| Azurill | 1F-17F | ? | ?% | |
| Glameow | 1F-17F | ? | ?% | |
| Leafeon | 1F-17F | 28 | ?% | |
| Pansage | 1F-17F | ? | ?% | |
| Simisear | 1F-17F | 30 | ?% | |
| Zebstrika | 1F-17F | ? | ?% | |
| Scolipede | 1F-17F | ? | ?% | |
| Lilligant | 1F-17F | ? | ?% | |
| Amoonguss | 1F-17F | ? | ?% | |
Unnumbered floors
Players can be warped to unnumbered floors of Withered Savanna, with an increased chance with higher Mysteriosity ratings.
| Pokémon | Floors | Levels | Recruit Rate | |
|---|---|---|---|---|
| Azurill | N/A | ? | Unrecruitable | |
| Glameow | N/A | ? | Unrecruitable | |
| Leafeon | N/A | ? | Unrecruitable | |
| Pansage | N/A | ? | Unrecruitable | |
| Simisear | N/A | ? | Unrecruitable | |
| Zebstrika | N/A | ? | Unrecruitable | |
| Seismitoad | N/A | ? | Unrecruitable | |
| Scolipede | N/A | ? | Unrecruitable | |
| Lilligant | N/A | ? | Unrecruitable | |
| Zorua | N/A | ? | Unrecruitable | |
Party
On the first visit, Hydreigon is on the player's team. Its stats (minus HP), Exp. Points, and "To next level" sections of the Status screen are all shown as "---".
|
| ||||||||||||||||||||
| Hydreigon Lv.64 | |||||||||||||||||||||
| |||||||||||||||||||||

Items
| Item | Floors | |
|---|---|---|
| 60-280 Poké | 1F-17F | |
| Oran Berry | 1F-17F | |
| Cheri Berry | 1F-17F | |
| Rawst Berry | 1F-17F | |
| Pecha Berry | 1F-17F | |
| 5 Gravelerock | 1F-17F | |
| All Dodge Orb | 1F-17F | |
| All Power-Up Orb | 1F-17F | |
| Escape Orb | 1F-17F | |
| Foe-Hold Orb | 1F-17F | |
| Health Orb | 1F-17F | |
| Rollcall Orb | 1F-17F | |
| Slow Orb | 1F-17F | |
| Slumber Orb | 1F-17F | |
| Blast Seed | 1F-17F | |
| Pure Seed | 1F-17F | |
| Reviver Seed | 1F-17F | |
| Totter Seed | 1F-17F | |
| Stun Seed | 1F-17F | |
| Vile Seed | 1F-17F | |
| Defense Scarf | 1F-17F | |
| Fickle Ribbon | 1F-17F | |
| Joy Ribbon | 1F-17F | |
| Reunion Cape | 1F-17F | |
| Special Band | 1F-17F | |
| Max Elixir | 1F-17F | |
Traps encountered
| Image | Trap | Floors |
|---|---|---|
 |
Slumber Trap | 4F |
 |
Warp Trap | 5F |
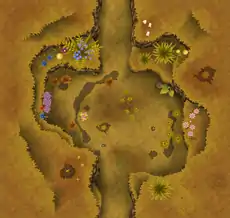
Layout
| Exit |
|---|
 |
In other languages
| ||||||||||||||||||
| This article is part of both Project Locations and Project Sidegames, Bulbapedia projects that, together, aim to write comprehensive articles on the Pokémon Locations and Sidegames, respectively. |
This article is issued from Bulbagarden. The text is licensed under Creative Commons - Attribution - Sharealike. Additional terms may apply for the media files.